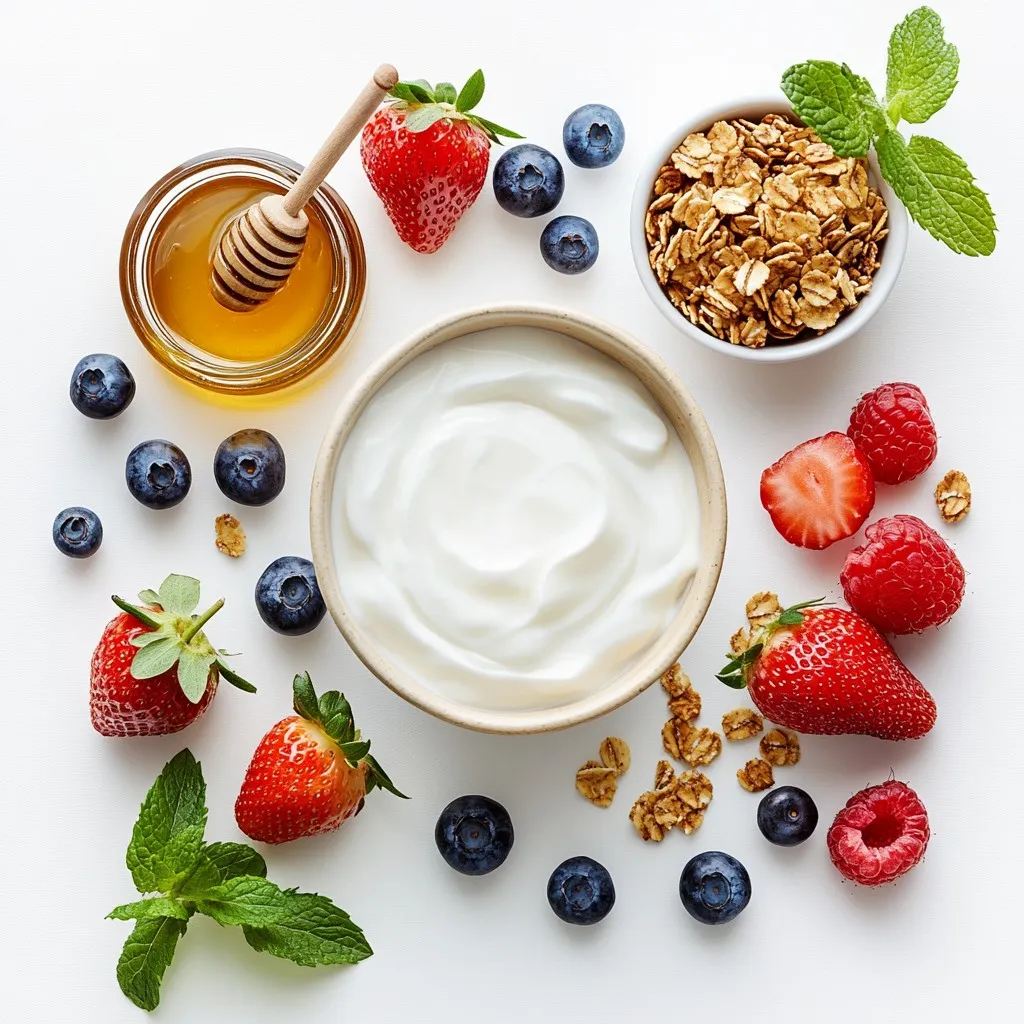
Looking for a cool way to beat the heat? These Berry Yogurt Parfait Popsicles are your answer! Bursting with vibrant flavors from fresh berries and creamy yogurt, they’re simple to whip up and fun to enjoy. You can customize sweetness and mix in extras that you love. Join me on this delicious journey, and let’s create a treat that will refresh your summer days!
Why I Love This Recipe
- Deliciously Healthy: This recipe combines Greek yogurt and fresh berries for a nutritious treat that’s low in calories but high in flavor.
- Easy to Make: With just a few simple steps, you can whip up these delightful popsicles in no time, making them perfect for a quick snack.
- Customizable: Feel free to change up the berries or sweeteners to suit your taste preferences, allowing endless variations for your perfect popsicle.
- Fun for Everyone: These popsicles are a hit with kids and adults alike, making them an ideal treat for summer gatherings or family fun.
Ingredients
Primary Ingredients
– 2 cups Greek yogurt (plain or vanilla)
– 1 cup mixed berries (strawberries, blueberries, raspberries)
– 2 tablespoons honey or maple syrup
Additional Ingredients
– 1 teaspoon vanilla extract
– ½ cup granola
– Fresh mint leaves (optional for garnish)
Berry yogurt parfait popsicles combine fresh flavors and creamy textures. You can use plain or vanilla Greek yogurt for a rich taste. Mixed berries offer a bright splash of color. I love using strawberries, blueberries, and raspberries together.
You can sweeten the mixture with honey or maple syrup. Adjust the sweetness based on your taste. A hint of vanilla extract adds warmth to the yogurt. For a crunchy surprise, sprinkle granola on top. Fresh mint leaves can add a pop of green, making each pop even more appealing.
These ingredients create a delightful treat. They are perfect for hot days and family gatherings. You will enjoy creating these popsicles. Each bite is a mix of creamy and fruity goodness!
Step-by-Step Instructions
Preparing the Berry Mixture
First, gather your mixed berries. You will need strawberries, blueberries, and raspberries. Place these berries in a blender. Add two tablespoons of honey or maple syrup for sweetness. Next, pour in one teaspoon of vanilla extract. Blend this mixture on high speed. You want it to be smooth and velvety. This berry mixture will give your popsicles a bright flavor.
Preparing the Yogurt Mixture
Now, take a mixing bowl and scoop in two cups of Greek yogurt. You can choose plain or vanilla yogurt. Stir the yogurt well until it becomes smooth and creamy. This step is key for a rich texture in your popsicles. The creamy yogurt will balance the tartness of the berries.
Layering the Popsicles
Take your popsicle molds and start layering. Add a spoonful of the berry mixture to each mold. Next, add a layer of the creamy yogurt over the berries. Repeat this layering until the molds are full. Make sure to finish with a layer of yogurt on top. This creates a nice base for the popsicle. For added crunch, sprinkle granola on top of the yogurt.
Freezing Process
Once the molds are filled, insert popsicle sticks. Place them in the center and keep them upright. Now, put the molds in the freezer. Let them freeze for at least four to six hours. When they are solid, you can take them out. To release the popsicles, run warm water over the molds for a few seconds. This will help them slide out easily. Enjoy your refreshing berry yogurt parfait popsicles!
Tips & Tricks
Achieving the Best Texture
To get the best texture for your popsicles, start with smooth yogurt. Stir the Greek yogurt well until it feels creamy. This makes each bite feel luxurious. Next, blend your mixed berries. Add honey or maple syrup and vanilla extract. Blend until the mix is velvety. This smoothness helps the popsicles freeze evenly.
Sweetness Adjustments
You can customize the sweetness of your popsicles easily. Add more honey or maple syrup if you love sweet treats. Taste the berry mix before you pour it. Adjust to your liking! Remember, the yogurt also adds some sweetness, so find a balance that suits you.
Presentation Tips
Presentation can make your popsicles even more inviting. Serve them in a rustic wooden bowl or a nice platter. Sprinkle extra granola around the popsicles for a fun crunch. For a pop of color, add fresh mint leaves on top. This adds a nice touch and a fresh aroma!
Pro Tips
- Choose the Right Yogurt: For a creamier texture, opt for full-fat Greek yogurt. If you prefer a lighter version, low-fat yogurt works well too.
- Berry Selection: Use fresh berries when possible for the best flavor. If using frozen, thaw and drain excess liquid to avoid watery popsicles.
- Layering Technique: To achieve visually appealing layers, pour the berry mixture slowly to prevent it from mixing with the yogurt.
- Experiment with Flavors: Feel free to add other fruits like mango or banana to the yogurt layer for a unique twist on flavor.
Variations
Flavor Variations
You can play with flavors by swapping fruits. Try tropical fruits like mango or pineapple. They add a sweet, bright taste. Peaches also work well and bring a nice, juicy texture. For a berry twist, mix blackberries or cherries with your favorites. The options are endless, so have fun with it!
Dietary Adjustments
If you need a dairy-free option, use coconut or almond yogurt. Both give a creamy texture and a slight nutty taste. Coconut yogurt adds a hint of sweetness that pairs well with berries. Almond yogurt is lighter but still rich. Both options keep the popsicle light and tasty.
Add-ins and Mix-ins
To boost nutrition, add nut butters like almond or peanut. They mix well with yogurt and provide healthy fats. Seeds like chia or flaxseed can also be great additions. They add fiber and crunch. Mix them in with the yogurt or layer them between the fruit and yogurt for a tasty surprise!
Storage Info
Freezing Tips
To keep your popsicles fresh, follow these tips:
– Use airtight containers or freezer bags.
– Wrap the popsicles in plastic wrap for extra protection.
– Label containers with the date for easy tracking.
– Freeze popsicles for at least 4-6 hours until solid.
Shelf Life
These popsicles can last up to two months in the freezer. After that, they may lose flavor and texture. Always check for ice crystals or freezer burn before enjoying.
Re-freezing Considerations
If you have leftover popsicles, avoid re-freezing them after they’ve melted. This can affect the taste and texture. Instead, enjoy them within a few days for the best experience. If you must re-freeze, try to consume them quickly.
FAQs
How do I make my popsicles less icy?
To make your popsicles creamier, use full-fat Greek yogurt. This adds richness and smoothness. Blend the berry mixture well until it is very smooth. You can also try adding a bit more honey or maple syrup. This extra sweetness helps reduce icy textures.
Can I use frozen berries?
Yes, you can use frozen berries. They work just as well as fresh ones. Just remember to let them thaw a bit before blending. This will help create a smooth mixture. Frozen berries often taste great, too, and can be more convenient.
What is the best way to pop out frozen popsicles?
To pop out your frozen popsicles, run warm water over the outside of the molds. Hold the mold under the water for a few seconds. This warms the outside and helps loosen the popsicle. You can also twist the mold gently to help release the popsicle.
How can I make these popsicles healthier?
To make these popsicles healthier, reduce the amount of honey or maple syrup. You can also use unsweetened yogurt. Adding seeds or nuts boosts nutrition too. Consider mixing in a bit of spinach for green popsicles. This adds vitamins without changing the taste much.
These homemade berry popsicles are simple, tasty, and fun to make. We discussed key ingredients like Greek yogurt and mixed berries, alongside steps for blending, layering, and freezing. Tips can help you achieve the best texture, customize sweetness, and present your popsicles beautifully. You can also try various flavors and dietary options. With proper storage, these treats last for weeks. Enjoy these refreshing snacks, knowing they require little effort and bring a splash of flavor to your day. Now, gather your ingredients and get starte