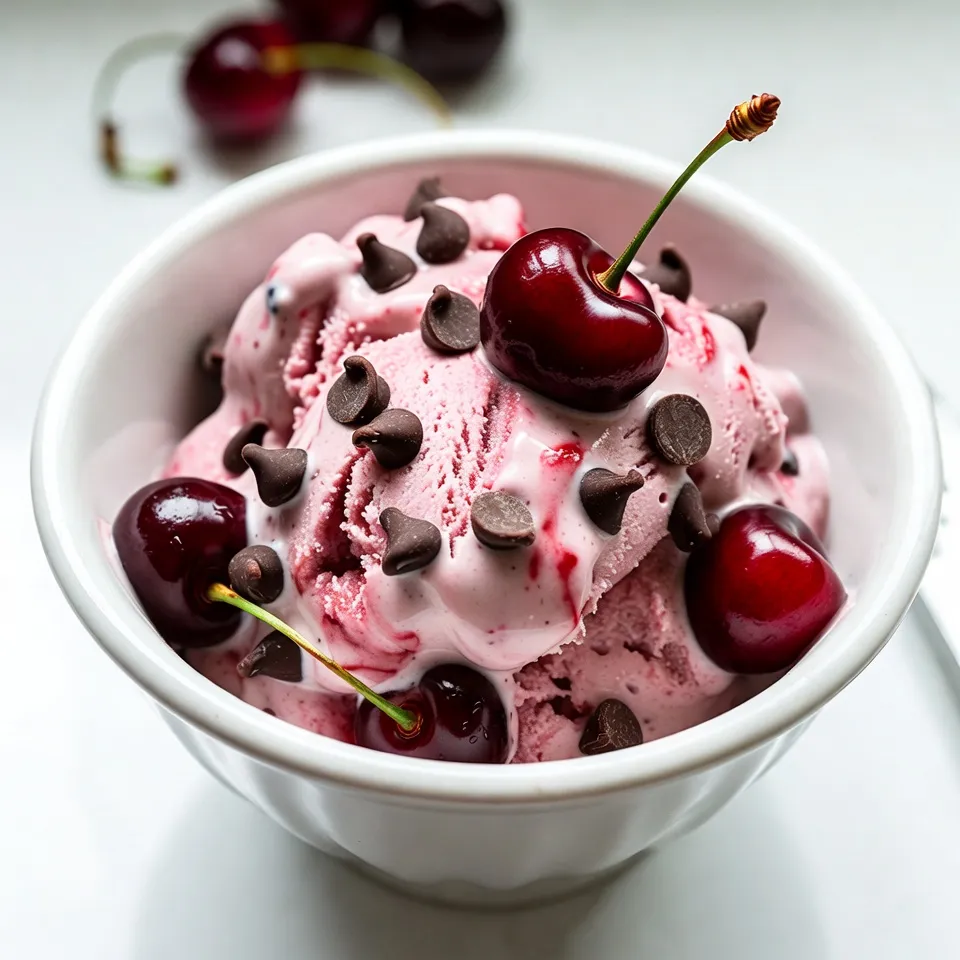
Are you ready to indulge in a rich and creamy Cherry Chocolate Chip Ice Cream? This delicious treat combines the sweetness of fresh cherries with the crunch of chocolate chips, creating a perfect dessert for any occasion. In this guide, I’ll walk you through easy steps to make this delightful ice cream at home. Get your taste buds ready for a flavorful journey that’s sure to impress!
Why I Love This Recipe
- Fresh and Fruity Flavor: The combination of ripe cherries and creamy ice cream creates a refreshing treat that’s perfect for warm days.
- Decadent Chocolate Chips: The semi-sweet chocolate chips add a rich, indulgent touch that balances the tartness of the cherries beautifully.
- Homemade Goodness: Making ice cream from scratch allows you to control the ingredients and customize flavors to your liking.
- Simple Preparation: This recipe requires minimal effort and time, making it an accessible dessert option for everyone to enjoy.
Ingredients
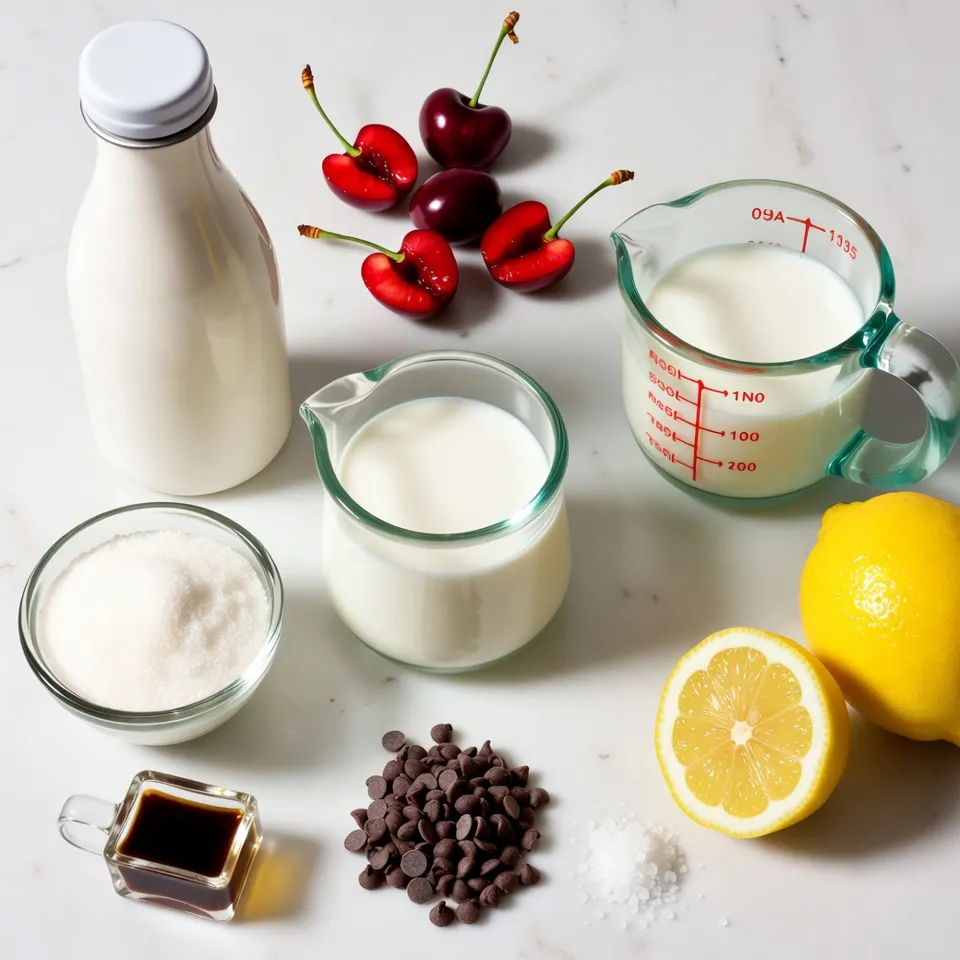
To make Cherry Chocolate Chip Ice Cream, gather these fresh ingredients:
– Fresh cherries: 2 cups, pitted and halved
– Heavy cream: 1 cup
– Whole milk: 1 cup
– Granulated sugar: 3/4 cup (divided)
– Vanilla extract: 1 teaspoon
– Semi-sweet chocolate chips: 1/2 cup
– Lemon juice: 1 tablespoon
– Pinch of salt
Each ingredient plays a key role in crafting this rich and creamy treat. The fresh cherries provide a sweet and tart flavor, while the heavy cream and whole milk create a smooth base. Sugar adds sweetness, and vanilla enhances the overall flavor. The chocolate chips bring a delightful crunch, making every bite enjoyable.
When selecting cherries, opt for ripe and juicy ones for the best taste. You can adjust the sugar based on your preference. If you want a richer flavor, use more chocolate chips. This combination of ingredients will help you create a truly delicious Cherry Chocolate Chip Ice Cream.
Step-by-Step Instructions
Cooking the Cherry Mixture
– Start by combining 2 cups of pitted and halved cherries with 1 tablespoon of lemon juice and 1/4 cup of sugar in a medium saucepan.
– Cook this mixture over medium heat for about 5 to 7 minutes. Stir it occasionally. You want the cherries to soften and release their juices.
– After cooking, take the saucepan off the heat. Let the mixture cool completely. Once cool, use a fork to gently mash the cherries. This creates a nice chunky sauce. Set this cherry mixture aside for later use.
Preparing the Ice Cream Base
– In a separate bowl, mix together 1 cup of heavy cream, 1 cup of whole milk, the remaining 1/2 cup of sugar, 1 teaspoon of vanilla extract, and a pinch of salt.
– Whisk these ingredients together until they are well combined, and the sugar dissolves completely.
Churning and Finalizing
– Pour the creamy mixture into your ice cream maker. Follow your machine’s instructions to churn the mix until it reaches a soft-serve consistency.
– When there are only 5 minutes left in the churning process, slowly add in the cherry mixture and 1/2 cup of semi-sweet chocolate chips. Let the machine mix these in evenly.
– Once done, transfer the ice cream to an airtight container. Place it in the freezer for at least 4 hours, or until it is firm enough to scoop.
– To serve, let the ice cream sit at room temperature for about 5 minutes. This helps it soften slightly, making it easier to scoop.
Tips & Tricks
Perfecting the Ice Cream Texture
To get the best texture, let your cherry mixture cool completely. This step helps blend flavors well. If you skip this, the heat can change the cream’s texture. After mixing, churn the base for about 20-25 minutes. This time helps it become smooth and creamy. Remember, over-churning can lead to icy ice cream.
Once your ice cream is ready, don’t serve it right away. Let it sit at room temperature for about 5 minutes. Softening it a bit makes scooping easier.
Serving Suggestions
For a beautiful presentation, use elegant bowls or tall glasses. Place a scoop of your cherry chocolate chip ice cream in the center. Add whole cherries on top for a pop of color. A drizzle of chocolate sauce also adds a nice touch.
Pair this ice cream with warm brownies or a slice of chocolate cake. It balances the flavors and makes a perfect dessert combo. You can enjoy it with a cup of coffee too. The flavors mix well and create a delightful experience.
Pro Tips
- Use Fresh Cherries: For the best flavor and texture, choose ripe, fresh cherries. Frozen cherries can work in a pinch, but they may alter the ice cream’s consistency.
- Chill Your Mixture: Before churning, ensure that your cream mixture is thoroughly chilled. This helps to achieve a creamier texture in your ice cream.
- Don’t Over-Churn: Keep an eye on the churning process. Over-churning can lead to a grainy texture. Stop once it reaches a soft-serve consistency.
- Experiment with Mix-Ins: Feel free to customize your ice cream by adding different mix-ins like nuts, or switching to dark chocolate chips for a richer taste.
Variations
Alternative Ingredients
You can change your ice cream by using different types of cherries. Try sour cherries for a tart twist or use black cherries for a richer flavor. Each type brings its own charm.
If you’re looking for dairy-free options, use coconut cream and almond milk. They create a creamy texture without dairy. You can also use cashew milk for a nutty taste.
Instead of semi-sweet chocolate chips, consider dark chocolate or white chocolate. Each choice alters the flavor and adds a new dimension. You might even try adding toffee bits for extra crunch.
Flavor Combinations
Adding nuts can boost the crunch factor. Chopped almonds or walnuts pair well with cherry. You can also throw in chopped strawberries or raspberries for a fruit medley.
Experimenting with flavor extracts can change your base. Add a touch of almond extract for a unique twist or a few drops of mint extract for freshness. Vanilla enhances the cherry flavor beautifully.
Creating a layered ice cream dessert is a fun way to serve this treat. Alternate layers of cherry ice cream with layers of whipped cream or chocolate sauce. This adds visual appeal and makes each scoop exciting.
Storage Info
Best Practices for Freezing
To keep your Cherry Chocolate Chip Ice Cream fresh, use an airtight container. This helps to avoid ice crystals and keeps the flavor strong. A container with a tight seal works best. Store your ice cream in the coldest part of your freezer. This ensures it stays firm and creamy. For the best taste and texture, eat it within two weeks. After that, it may lose its freshness.
Thawing Instructions
When you want to enjoy your ice cream, thaw it safely. Set the container on the counter for about 5 to 10 minutes. This method warms the outside without melting the whole ice cream. If you want to keep the texture, avoid using a microwave. Microwaving can cause ice cream to turn runny. Remember to scoop gently to maintain that rich and creamy delight.
FAQs
How can I make this ice cream without an ice cream maker?
You can make Cherry Chocolate Chip Ice Cream without an ice cream maker. First, prepare the ice cream base as usual. After mixing the cream, milk, sugar, and vanilla, pour it into a shallow dish. Place it in the freezer. Every 30 minutes, stir the mixture with a fork for about 3 hours. This helps break up ice crystals and gives a smooth texture.
Can I use frozen cherries instead of fresh?
Yes, you can use frozen cherries. Just thaw them before you start. Drain any excess juice to avoid making the ice cream too watery. The flavor will still be great, and it saves time during prep.
What is the nutritional information for Cherry Chocolate Chip Ice Cream?
A serving of Cherry Chocolate Chip Ice Cream has about 250 calories. It contains 12 grams of fat, 30 grams of carbs, and 4 grams of protein. These numbers can vary based on ingredients used, so check your labels for accuracy.
How long can I store homemade ice cream?
You can store homemade ice cream in the freezer for up to 2 weeks. After that, it may lose its creamy texture. Make sure to keep it in an airtight container to prevent freezer burn.
Can I use alternative sweeteners in this recipe?
Yes, you can use alternative sweeteners. Options like honey, agave, or stevia work well. Just remember to adjust the amount based on the sweetness level of the substitute. This can change the flavor slightly, but it can be a healthier choice.
This blog post shared a simple recipe for Cherry Chocolate Chip Ice Cream. We covered fresh ingredients, step-by-step cooking, and tips for perfect texture. You learned how to customize the recipe with different flavors and how to store your ice cream. Making this treat at home is fun and rewarding. Enjoy experimenting with flavors and sharing this delightful dessert with friends and family. Feel free to ask questions if needed, and dive into your ice cream-making adventur