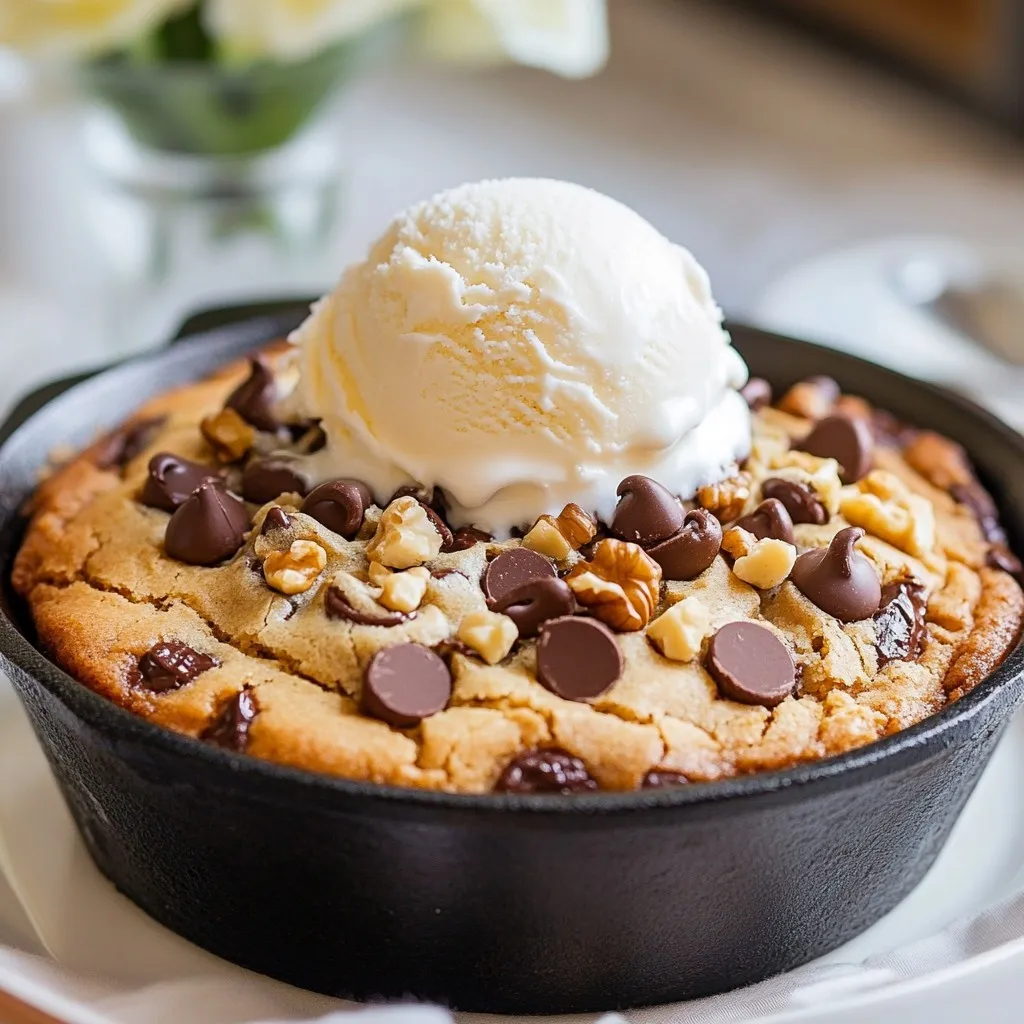
Are you ready to bake the ultimate dessert? This Chocolate Chip Cookie Skillet is the perfect blend of warm, gooey goodness and crunchy edges. In just a few simple steps, you’ll create a treat that will delight your friends and family. Whether you serve it plain or with ice cream, this recipe is sure to impress. Let’s gather our ingredients and get started on this sweet adventure!
Why I Love This Recipe
- Easy to Make: This skillet cookie recipe requires minimal effort and ingredients, making it perfect for both novice and seasoned bakers.
- Shareable Delight: Baking it in a skillet means you can serve it straight from the oven, creating a fun and interactive dessert experience.
- Warm and Gooey: The combination of a soft center with crispy edges is irresistible, especially when paired with melting vanilla ice cream.
- Customizable: You can add your favorite mix-ins like nuts or different types of chocolate, allowing you to personalize this recipe to your taste.
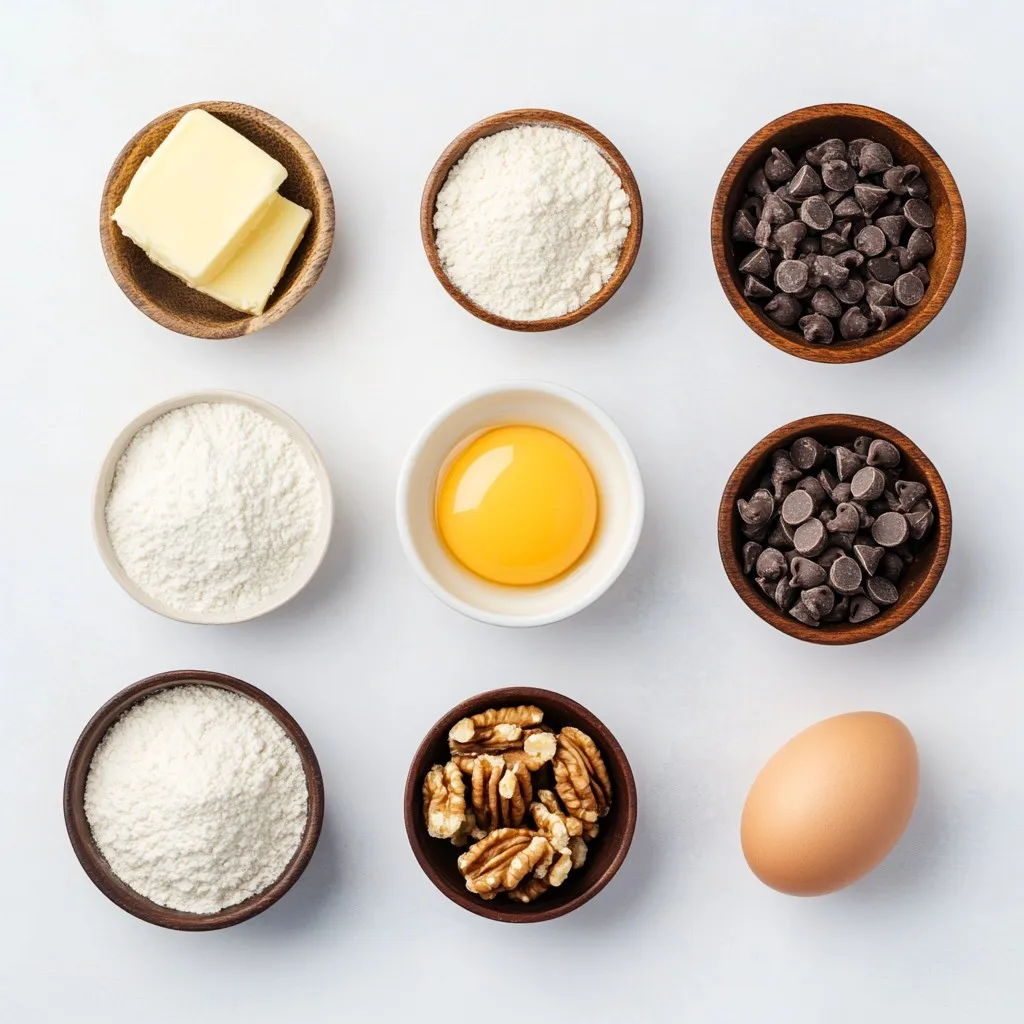
Ingredients
List of Primary Ingredients
– 1 cup all-purpose flour
– 1/2 teaspoon baking soda
– 1/4 teaspoon salt
– 1/2 cup unsalted butter, softened
– 1/2 cup packed brown sugar
– 1/4 cup granulated sugar
– 1 teaspoon pure vanilla extract
– 1 large egg, at room temperature
– 1 cup semi-sweet chocolate chips
Optional Ingredients
– 1/2 cup chopped walnuts (for added crunch)
– Vanilla ice cream (for serving)
Ingredient Substitutions
You can swap all-purpose flour with gluten-free flour for a gluten-free option. Instead of unsalted butter, you can use coconut oil or a dairy-free butter. If you want less sugar, try using a sugar substitute like stevia or monk fruit. If you don’t have brown sugar, use more granulated sugar but add a bit of molasses for a similar flavor.
Step-by-Step Instructions
Preparing the Oven and Mixing Bowls
First, preheat your oven to 350°F (175°C). This step is essential for even baking. While the oven heats, gather your mixing bowls. You’ll need one small bowl and one large bowl. The small bowl is for the dry ingredients. The large bowl is for the wet ingredients. This setup makes mixing easier.
Creaming the Butter and Sugars
In the large mixing bowl, add your softened butter, packed brown sugar, and granulated sugar. Use an electric mixer on medium speed. Mix until the blend is light and fluffy. This should take about 2-3 minutes. Next, add one teaspoon of pure vanilla extract and one large egg. Beat until everything is smooth and well mixed.
Incorporating the Dry Ingredients
Now, take the small bowl with the flour, baking soda, and salt. Gradually add this mixture to the butter-sugar mix. Stir gently with a spatula or wooden spoon. Mix just until combined. Be careful not to overmix, as this can change the cookie’s texture.
Baking the Cookie Skillet
Before pouring in the dough, lightly grease a 10-inch oven-safe skillet. You can use non-stick spray or a bit of extra softened butter. Pour the cookie dough into the skillet, spreading it out evenly. Bake in the preheated oven for 20-25 minutes. The edges should be golden brown, and the center should look set yet soft. Once done, let it cool for a few minutes. Serve warm, topped with vanilla ice cream for a delicious dessert!
Tips & Tricks
How to Achieve the Perfect Texture
To get the best texture, use room temperature butter and egg. This helps the dough mix well. Cream the butter and sugars until fluffy. This adds air, making the cookie soft. Don’t overmix when adding flour. This keeps the cookie from being tough. Bake until the edges are golden and the center is soft. This gives a chewy middle.
Best Practices for Skillet Baking
Always preheat your oven to 350°F (175°C). This ensures even baking. Use a 10-inch oven-safe skillet for the best results. Lightly grease the skillet with non-stick spray or butter. This prevents sticking. Spread the dough evenly in the skillet. This helps it cook evenly. Check the cookie in the oven at 20 minutes. This way, you catch it before it overbakes.
Serving Suggestions for Maximum Enjoyment
Serve the cookie warm for the best taste. Add a scoop of vanilla ice cream on top. The warm cookie and cold ice cream create a great mix. You can drizzle chocolate sauce over it for extra sweetness. A sprinkle of sea salt also adds a nice touch. Slice the cookie into wedges for easy serving. Enjoy it straight from the skillet for a cozy feel!
Pro Tips
- Perfect Butter Consistency: Ensure that your butter is softened to room temperature for the best creaming results. This helps to create a light and fluffy texture in your cookie dough.
- Don’t Overmix: Once you add the flour mixture, mix just until combined. Overmixing can lead to tough cookies instead of the desired soft and chewy texture.
- Customize Your Mix-Ins: Feel free to swap out chocolate chips for your favorite varieties, such as white chocolate or peanut butter chips. You can also add dried fruits for a different flavor profile.
- Serving Suggestion: For an extra special touch, serve your skillet cookie with a drizzle of caramel or chocolate sauce over the top, along with the vanilla ice cream.
Variations
Healthier Ingredient Options
You can swap some ingredients for healthier choices. Use whole wheat flour instead of all-purpose flour. This adds fiber and nutrients. Try maple syrup or coconut sugar instead of regular sugar. These options offer a lower glycemic index. You can also replace butter with coconut oil for a dairy-free treat.
Flavor Add-Ins (Nuts, Spices, etc.)
Feel free to get creative with add-ins. Chopped nuts, like walnuts or pecans, add crunch and flavor. You can also mix in spices like cinnamon or nutmeg for warmth. Want a twist? Add a pinch of sea salt to enhance the chocolate flavor. Dried fruit, like cranberries or cherries, can add a sweet touch, too.
Alternative Toppings for Serving
Toppings can take your cookie skillet to the next level. Vanilla ice cream is a classic choice. You can also try whipped cream for a lighter option. Drizzle with chocolate or caramel sauce for added sweetness. For a fresh touch, top with sliced strawberries or banana. These toppings make each bite exciting and delicious.
Storage Info
How to Store Leftover Cookie Skillet
After you enjoy your cookie skillet, let it cool. Once cool, cover the skillet with plastic wrap or foil. You can also transfer the cookie to an airtight container. Store it at room temperature for up to three days. If you want to keep it longer, move it to the fridge for up to a week.
Reheating Instructions
To reheat your cookie skillet, preheat your oven to 300°F (150°C). Place the skillet in the oven for about 10-15 minutes. This will warm it up nicely. If you prefer, you can microwave a slice for about 20-30 seconds. Just be careful not to overheat it, or it may get tough.
Freezing Tips for Later Enjoyment
You can freeze your cookie skillet for future treats. First, let it cool completely. Then, wrap it tightly in plastic wrap. After that, wrap it again in aluminum foil. This double wrapping helps prevent freezer burn. You can freeze it for up to three months. When you’re ready to enjoy it, thaw it in the fridge overnight and reheat as mentioned above.
FAQs
Can I make this cookie skillet dairy-free?
Yes, you can make this cookie skillet dairy-free. Use a dairy-free butter substitute. Look for options like coconut oil or vegan butter. These options work well in the recipe. Ensure your chocolate chips are also dairy-free. This way, you can still enjoy a tasty treat!
How do I know when the cookie is done baking?
To check if the cookie is done, look for golden edges. The center should feel set but soft. A toothpick test works, too! Insert it into the center. If it comes out with a few moist crumbs, it’s ready. Remember, the cookie will continue to cook a little after you take it out.
Can I use a different type of skillet?
Yes, you can use a different type of skillet. A cast-iron skillet works great and gives a nice crust. You can also use a ceramic or glass baking dish. Just make sure it is oven-safe. Adjust the baking time slightly if you use a different size or type. Enjoy your cookie in any skillet you have!
In this article, we explored how to make a delicious cookie skillet. We looked at essential ingredients, step-by-step instructions, and tips for perfect texture. You learned about fun variations, proper storage, and answers to common questions.
Remember, the key is to have fun and be creative. Enjoy your tasty cookie skillet with your favorite toppings. You’ll impress your friends and family with this simple yet delicious treat. Happy bakin