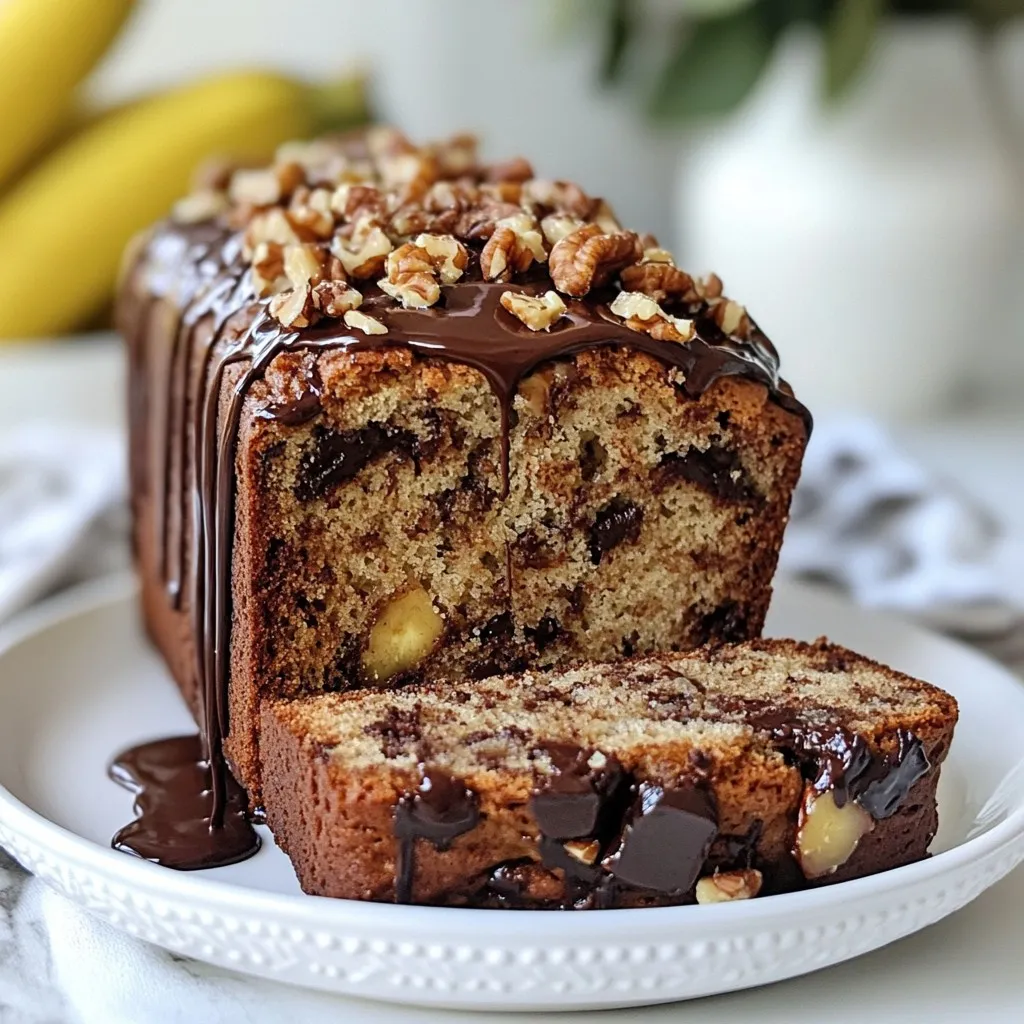
Are you ready to bake something delicious? This Chocolate Chunk Banana Bread is simple and oh-so-tasty. With just a few ripe bananas and chocolate chunks, you’ll create a treat that everyone will love. I’ll guide you through each step, from gathering ingredients to baking. Whether you’re a novice or a pro, get ready to make a loaf that smells amazing and tastes even better! Let’s get started!
Why I Love This Recipe
- Deliciously Moist: This banana bread is incredibly moist thanks to the ripe bananas and coconut oil, making each slice a delightful treat.
- Rich Chocolate Flavor: The addition of dark chocolate chunks elevates the flavor profile, adding a decadent touch to the classic banana bread.
- Easy to Make: With simple ingredients and straightforward instructions, this recipe is perfect for bakers of all skill levels.
- Customizable: You can easily add nuts or other mix-ins to suit your taste, making it a versatile recipe for any occasion.
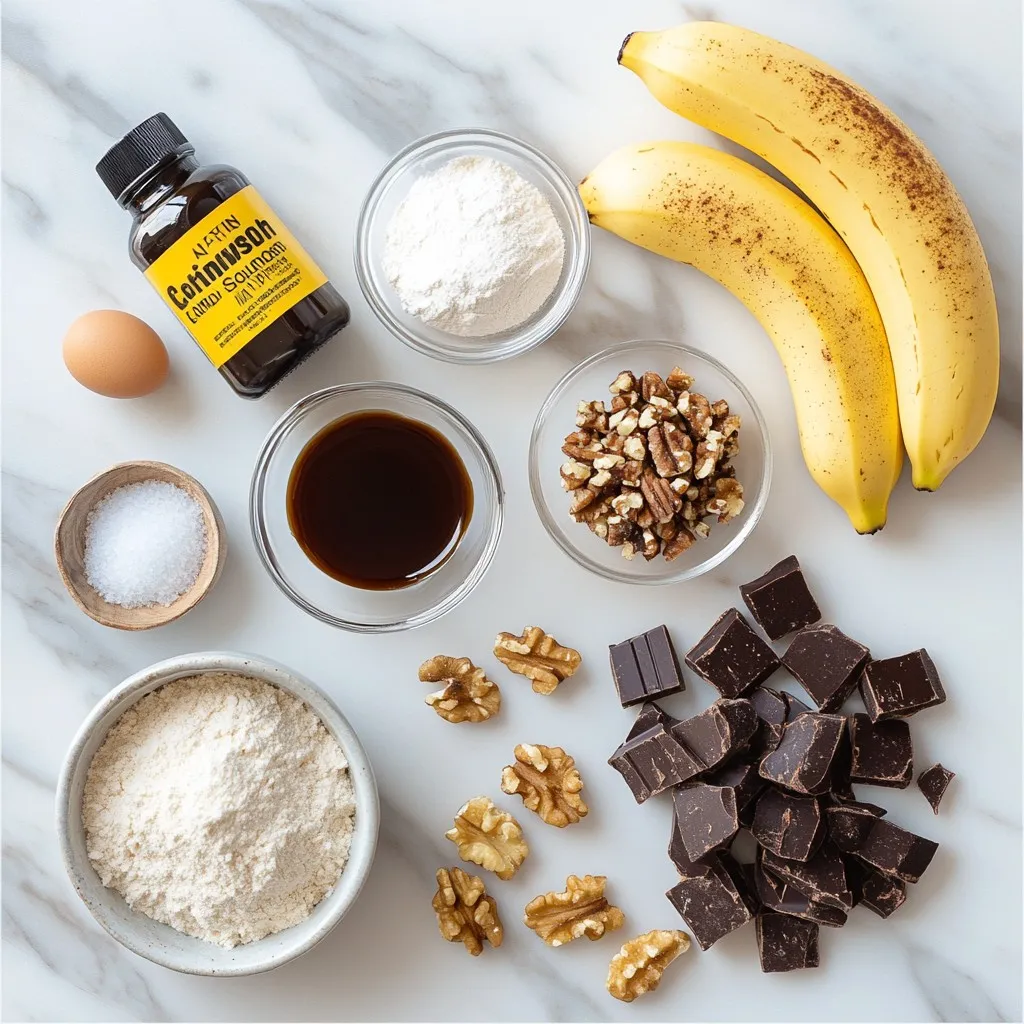
Ingredients
Main Ingredients
– 3 ripe bananas
– 1/3 cup coconut oil
– 1 large egg
– 1/2 cup packed brown sugar
Dry Ingredients
– 1 teaspoon baking soda
– 1/4 teaspoon fine sea salt
– 1 1/2 cups all-purpose flour
Add-ins
– 1/2 cup dark chocolate chunks
– 1/2 cup chopped walnuts (optional)
To make chocolate chunk banana bread, you need a few key ingredients. The bananas give the bread its natural sweetness and moistness. I recommend using ripe bananas. They are easier to mash and taste better. Coconut oil adds a nice flavor and keeps the bread soft.
For dry ingredients, you will use baking soda and fine sea salt. Baking soda helps the bread rise, while salt enhances the flavors. All-purpose flour creates the bread’s structure.
You can add dark chocolate chunks for that rich, sweet touch. If you like a bit of crunch, sprinkle in some chopped walnuts. They are optional but tasty. These ingredients come together to make a delicious treat that everyone will enjoy.
Step-by-Step Instructions
Preparation
1. Preheat your oven to 350°F (175°C). Grease a 9×5 inch loaf pan well. You can also line it with parchment paper for easy removal.
2. In a large bowl, mash 3 ripe bananas until smooth. Add 1/3 cup of melted coconut oil. Mix them together until they blend well.
Mixing the Batter
1. Add in 1 large beaten egg, 1/2 cup of packed brown sugar, and 1 teaspoon of pure vanilla extract. Stir until everything is mixed and the sugar starts to dissolve.
2. Sprinkle in 1 teaspoon of baking soda and 1/4 teaspoon of fine sea salt. Mix gently to combine.
3. Gradually fold in 1 1/2 cups of sifted all-purpose flour. Stir just until no dry flour shows. Be careful not to overmix, or your bread will be dense.
4. Gently fold in 1/2 cup of dark chocolate chunks and 1/2 cup of chopped walnuts, if you like. Make sure they are evenly spread throughout the batter.
Baking
1. Pour the batter into your prepared loaf pan. Use a spatula to smooth the top for even baking.
2. Place the pan in the preheated oven and bake for 55-60 minutes. Check doneness by inserting a toothpick into the center. It should come out clean or with a few crumbs.
3. Let the bread cool in the pan for about 10 minutes. Then, transfer it to a wire rack to cool completely.
Tips & Tricks
Getting the Perfect Texture
To get the best texture for your banana bread, avoid overmixing the batter. Mix just until the flour disappears. This helps keep the bread light and fluffy. Use ripe bananas for natural sweetness. The browner the bananas, the sweeter your bread will be.
Enhancing Flavor
You can boost the flavor by adding spices like cinnamon or nutmeg. These spices add warmth and depth to your bread. Also, try using different types of chocolate. Dark chocolate gives a rich taste, while milk chocolate adds a creamy touch.
Presentation Tips
When serving, slice the banana bread thick or thin, based on your choice. For a special touch, drizzle melted chocolate on top. You can also spread nut butter on each slice. This adds richness and makes it even more delicious. Garnish with chopped walnuts for a nice crunch and eye appeal.
Pro Tips
- Ripeness Matters: Use very ripe bananas for the best flavor and sweetness. The more speckles on the banana peel, the better the taste!
- Coconut Oil Substitution: If you don’t have coconut oil, you can substitute it with melted butter or vegetable oil for a different flavor profile.
- Mixing Technique: Be careful not to overmix the batter once you add the flour. This can lead to a dense loaf instead of a light, fluffy texture.
- Cooling Time: Allow the bread to cool completely before slicing to ensure clean cuts and maintain its structure. This helps avoid a mushy texture.
Variations
Healthier Options
You can make Chocolate Chunk Banana Bread even better for you. Here are two easy ways:
– Substituting with whole wheat flour: This swap adds fiber and nutrients. It can make the bread denser. Replace all-purpose flour with whole wheat flour in a 1:1 ratio. Your bread will still taste great!
– Using maple syrup instead of brown sugar: Maple syrup brings a unique flavor. It also cuts down on refined sugar. Use about 1/3 cup of maple syrup. Adjust the liquid in the recipe by reducing the coconut oil slightly.
Flavor Variations
Mixing in different flavors can make your banana bread special:
– Adding dried fruit or coconut: Dried cherries or raisins give a sweet burst. Shredded coconut adds a tropical twist. Just add about 1/2 cup of either to the batter.
– Experimenting with different nuts: You can switch walnuts for pecans or almonds. Each nut adds a different crunch and taste. Chop them up and fold them in just like the walnuts.
Gluten-Free Option
If you need a gluten-free version, it’s simple:
– How to make gluten-free Chocolate Chunk Banana Bread: Use a gluten-free flour mix. Brands like Bob’s Red Mill or King Arthur Flour work well. Swap all-purpose flour for the gluten-free mix in a 1:1 ratio. This keeps the texture nice and soft. Make sure to check the baking soda and salt for gluten-free labels too.
Storage Info
Storing Leftovers
To keep your chocolate chunk banana bread fresh, let it cool completely. Wrap it tightly in plastic wrap. You can also use aluminum foil. For best results, store it in an airtight container. This helps keep the moisture in, so the bread stays soft.
Freezing Instructions
If you want to freeze the bread, slice it first. Wrap each slice in plastic wrap. Then, place the slices in a freezer bag. Squeeze out any air before sealing. To thaw, take out a slice and leave it at room temperature. You can also warm it in the microwave or toaster oven.
Shelf Life Guidelines
Banana bread can last about three days at room temperature if stored well. If you keep it in the fridge, it can last about a week. Look for signs of spoilage like mold or a sour smell. If you see or smell anything off, it’s best to toss it.
FAQs
How do I know when the banana bread is done?
You can check the banana bread for doneness in a few ways:
– Insert a toothpick into the center of the loaf.
– If it comes out clean or with a few crumbs, it’s done.
– The top should look golden brown and feel firm to the touch.
– You may also notice a slight crack on top, which is a good sign.
Can I use frozen bananas?
Yes, you can use frozen bananas!
– Thaw the bananas first by leaving them at room temperature.
– You can also microwave them for a short time to speed up the process.
– Once thawed, mash them until smooth and proceed with the recipe.
– Using frozen bananas can make your bread extra moist and sweet.
What can I substitute for coconut oil?
If you don’t have coconut oil, there are great alternatives:
– You can use vegetable oil or canola oil.
– Unsalted butter is another option, but it adds a rich flavor.
– Each oil will change the taste slightly, but they all work well.
– Feel free to experiment and find your favorite!
This blog post covered how to make delicious Chocolate Chunk Banana Bread. We looked at key ingredients like ripe bananas and coconut oil. You learned step-by-step instructions for mixing and baking. Tips included using ripe bananas for sweetness and avoiding overmixing. We also shared variations for health and flavor. Finally, we discussed how to store leftovers for later enjoyment.
Enjoy baking, and make your kitchen smell wonderfu