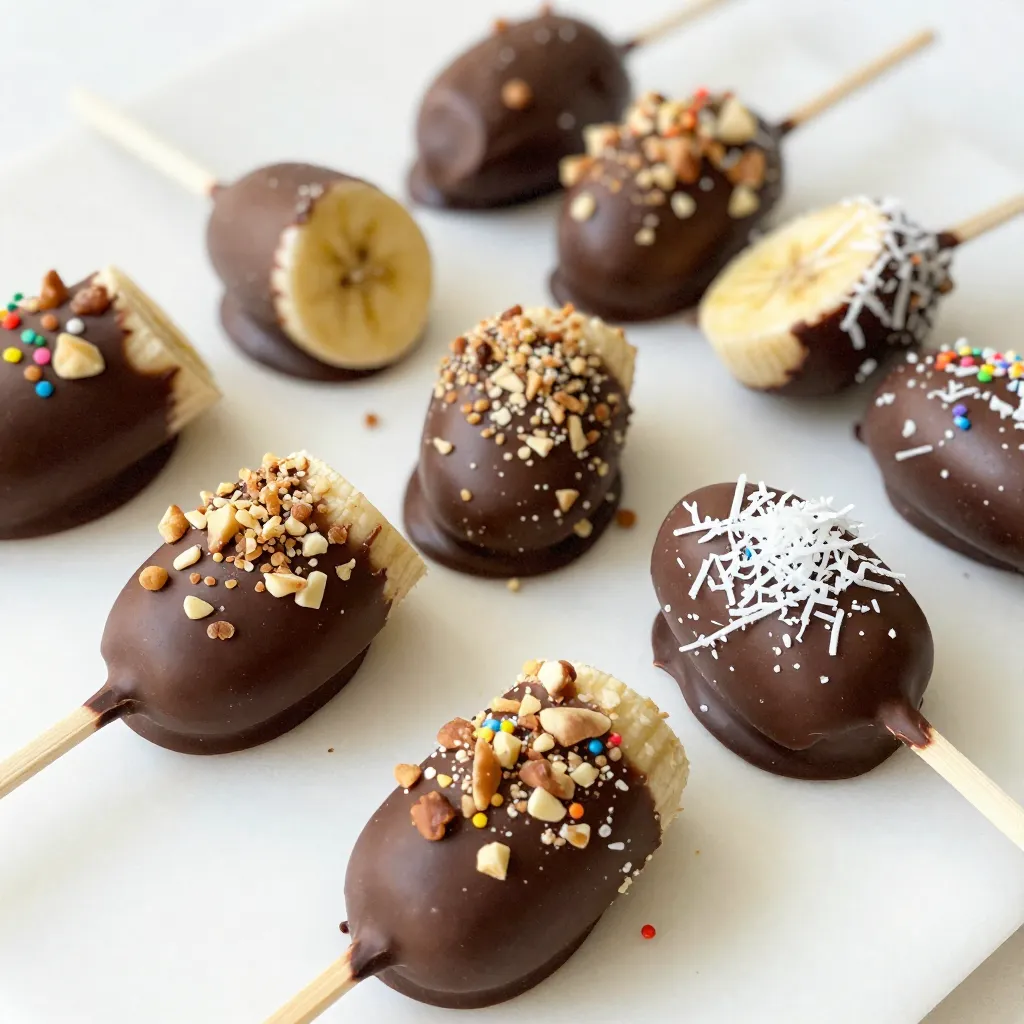
Looking for a sweet treat that’s simple and fun to make? Chocolate covered banana pops are your answer! With just a few easy ingredients, you can create a delicious snack that kids and adults love. I’ll guide you step-by-step through making these delightful pops, from choosing the perfect bananas to decorating them with tasty toppings. Let’s dive in and whip up this easy, tasty treat!
Why I Love This Recipe
- Easy to Make: This recipe is quick and simple, making it a perfect choice for both novice and experienced cooks.
- Healthy Indulgence: Using bananas and dark chocolate creates a delicious treat that feels indulgent yet is packed with nutrients.
- Customizable: You can easily personalize your banana pops with various toppings like nuts, coconut, or sprinkles.
- Fun for All Ages: These banana pops are a hit with kids and adults alike, making them a great dessert for any occasion.
Ingredients
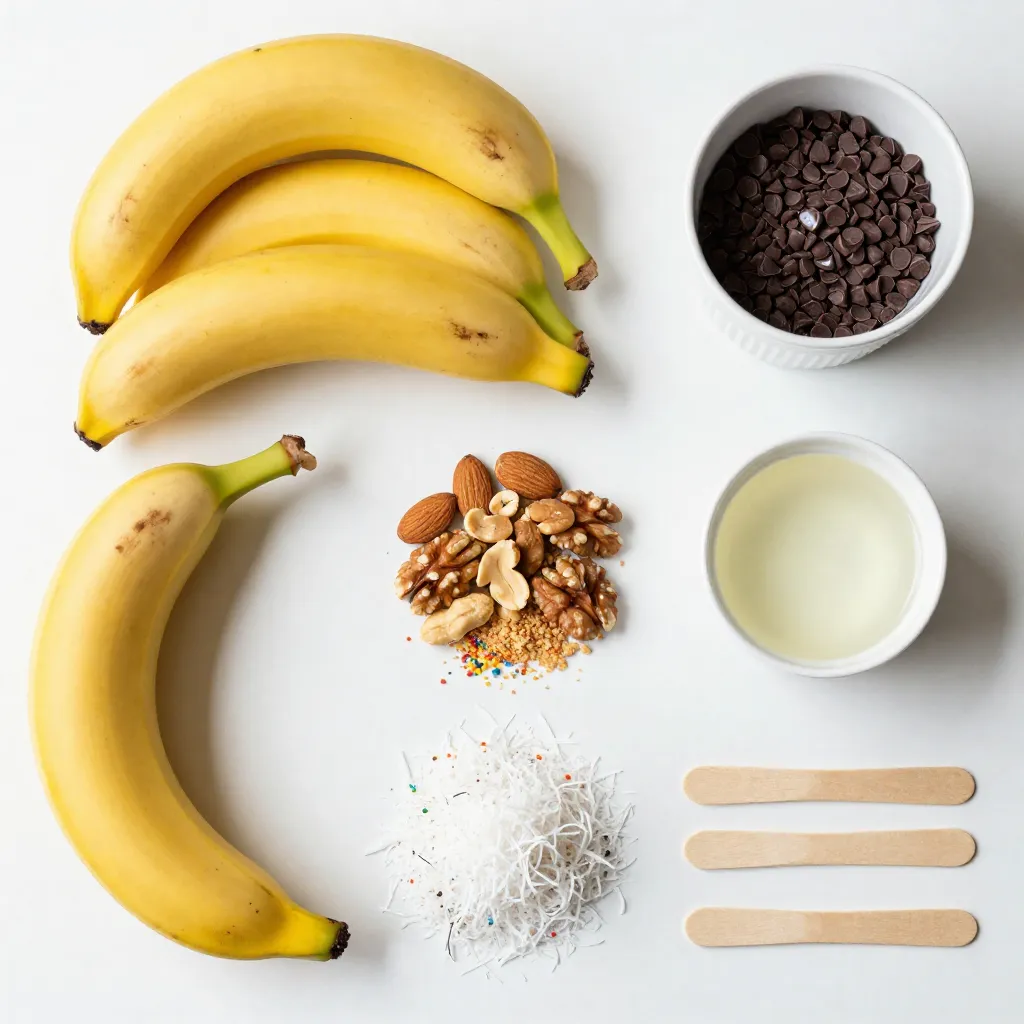
To make chocolate-covered banana pops, you need a few simple ingredients. Here’s what you will need:
– 4 ripe bananas
– 1 cup dark chocolate chips
– 1 tablespoon coconut oil
– 1/2 cup crushed nuts (almonds, walnuts, peanuts)
– 1/4 cup unsweetened shredded coconut
– 1/4 cup colorful sprinkles (optional)
– 4 wooden popsicle sticks
These ingredients come together to create a fun and tasty treat. Ripe bananas are key; they add natural sweetness and flavor. Dark chocolate chips give a rich taste. Coconut oil helps the chocolate melt smoothly.
You can get creative with toppings. Choose your favorite nuts, or use sprinkles for a pop of color. The shredded coconut adds a tropical touch. This mix of flavors makes the pops exciting for everyone!
Step-by-Step Instructions
Preparing the Bananas
First, peel the ripe bananas. Slice each banana in half. You should have eight pieces. Next, take a wooden popsicle stick. Carefully insert it into the cut end of each banana half. This helps you hold the banana pop later. Arrange these banana pops on a baking sheet lined with parchment paper. This will stop them from sticking.
Melting the Chocolate
Now, let’s make the chocolate coating. In a microwave-safe bowl, mix one cup of dark chocolate chips with one tablespoon of coconut oil. The oil helps the chocolate melt smoothly. Place this bowl in the microwave. Heat it in 30-second intervals. After each time, take it out and stir. Keep doing this until the chocolate is fully melted and smooth.
Coating the Bananas
Take each banana half and dip it into the melted chocolate. Make sure it is well-coated all around. Lift it out slowly, letting any extra chocolate drip back into the bowl. This step is key for a nice, even coating.
Decorating the Pops
While the chocolate is still wet, roll the banana in your choice of toppings. You can use crushed nuts, shredded coconut, or colorful sprinkles. This adds flavor and makes them look fun! After decorating, place each banana pop back on the baking sheet. Repeat this until all the banana halves are coated and decorated.
Freezing the Banana Pops
Once all the banana pops are ready, transfer the baking sheet to the freezer. Let them chill for at least two hours. This time helps the chocolate set and firm up. For the best results, make sure they are fully frozen before serving. Enjoy your delicious banana pops straight from the freezer!
Tips & Tricks
Choosing the Right Bananas
Using ripe bananas is key for sweetness. Look for bananas with yellow skin and small brown spots. These spots mean the fruit is sweet and ready to eat. Avoid green bananas, as they taste starchy and firm. You want bananas that are soft but not mushy. The right ripeness makes your treats taste much better.
Melting Chocolate Tips
Melting chocolate can be tricky. To avoid burning, use a microwave-safe bowl. Mix dark chocolate chips with coconut oil for a smooth blend. Heat in 30-second bursts, stirring each time. This helps the chocolate melt evenly. If you notice any lumps, keep stirring until it is smooth. A smooth consistency makes coating the bananas easy and delightful.
Decorating Suggestions
Get creative with toppings! After dipping bananas in chocolate, roll them in fun toppings. Crushed nuts add crunch, while shredded coconut adds flavor. Colorful sprinkles bring joy and brightness to your treats. You can mix and match toppings for different flavors. Experimenting with toppings makes each banana pop unique and exciting!
Pro Tips
- Choose Ripe Bananas: Ensure your bananas are ripe for the best flavor and creaminess. Look for bananas that are yellow with some brown spots for optimal sweetness.
- Use High-Quality Chocolate: Opt for high-quality dark chocolate for a richer taste. The better the chocolate, the more delicious your pops will be!
- Experiment with Toppings: Get creative with your toppings! Try different combinations of nuts, coconut, and sprinkles to find your favorite flavor profile.
- Store Properly: To keep your banana pops fresh, store them in an airtight container in the freezer. They can last for up to a month!
Variations
Flavor Variations
You can switch up the flavor of your banana pops easily. Try using different types of chocolate. Milk chocolate gives a creamy taste, while white chocolate adds sweetness. You can also use flavored chocolate, like mint or orange, for fun twists. Adding flavored extracts can change the game too. A drop of vanilla or almond extract can make your pops more exciting. Spice it up! A sprinkle of cinnamon or a dash of cayenne can add warmth and depth.
Additional Ingredients
Want to boost the treat? Incorporate nut butters or yogurt. Spread a layer of creamy peanut butter or almond butter on the banana before dipping it in chocolate. This adds richness and protein. If you love yogurt, dip the banana in yogurt first. Then, cover it in chocolate. This creates a tangy and sweet flavor combo. You can even use Greek yogurt for a healthier twist.
Festive Toppings
Make your banana pops festive with toppings. Use themed sprinkles for holidays. For Halloween, add spooky sprinkles. During Christmas, use red and green ones. You can also add crushed candies or fun toppings like mini marshmallows. Seasonal toppings make your pops fun and visually appealing. Get creative and let the toppings match your mood or occasion!
Storage Info
Storing Banana Pops
To store your chocolate-covered banana pops, first, make sure they are fully frozen. After they freeze for at least two hours, you can transfer them to a freezer-safe bag. Lay them flat in the bag, so they do not stick together. This method keeps them fresh and easy to grab.
Shelf Life
Chocolate-covered banana pops can last up to three months in the freezer. They stay tasty and fun to eat during this time. Just remember to check for any ice crystals that may form. If you see them, the pops may not taste as good.
Reheating/Serving Tips
When you are ready to enjoy a banana pop, take it straight from the freezer. Serve them frozen for the best taste. If you let them sit out for a minute, they will soften slightly, making the chocolate a bit easier to bite. These pops are great for a hot day or a special treat!
FAQs
Can I use frozen bananas for this recipe?
Using frozen bananas changes the texture and taste. Fresh bananas are firm and sweet. When you freeze them, they become mushy. This affects how well the chocolate sticks. Using fresh bananas gives you the best results for chocolate-covered pops. If you only have frozen bananas, it’s best to use them in smoothies instead.
Is there a dairy-free option for the chocolate?
Yes, you can use dairy-free chocolate. Look for dark chocolate chips that are labeled dairy-free. You can also use vegan chocolate brands. These options work well and taste great. This way, everyone can enjoy the banana pops, even those with dairy allergies.
How long do the banana pops take to freeze?
The banana pops need to freeze for at least 2 hours. This time lets the chocolate harden properly. If you want them extra firm, you can freeze them longer. Just make sure to store them in an airtight container to keep them fresh.
Can I make these banana pops in advance?
Yes, you can make these banana pops ahead of time. They store well in the freezer. Just keep them in a sealed bag or container. This makes them a great treat for parties or snacks. You can prepare them a day or two in advance.
You’ve learned how to make tasty banana pops with simple steps. Start with ripe bananas, melt chocolate, and add fun toppings. This treat is fun to make and share. You can mix flavors and toppings to fit any occasion. Store them well for later enjoyment. With these easy tips, you can impress friends or family. Enjoy creating your unique banana pops, and let your creativity shin