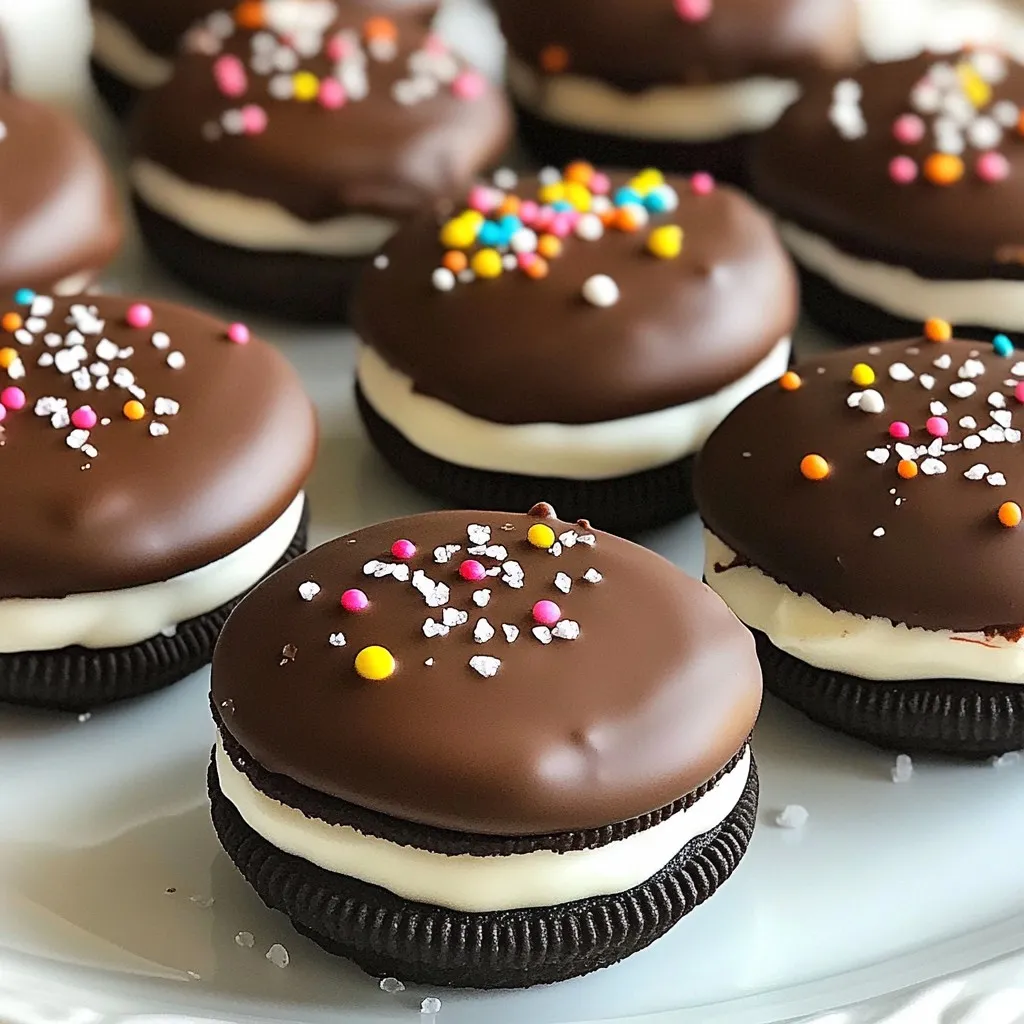
If you love sweet treats, you’re in for a real delight with chocolate-covered Oreos! These easy-to-make snacks bring together the classic Oreo cookie and rich chocolate. You can customize them with fun toppings, too! In this post, I will guide you through each step, share helpful tips, and explore delicious variations. Get ready to create mouthwatering bites everyone will adore!
Why I Love This Recipe
- Easy to Make: This recipe requires minimal effort and ingredients, making it perfect for both beginners and experienced bakers.
- Customizable: You can easily customize the toppings and chocolate types, allowing for endless variations and creativity.
- Perfect for Any Occasion: Whether it’s a party, holiday, or just a sweet treat for yourself, these Oreos are always a hit.
- Decadent Flavor: The combination of rich chocolate and classic Oreos creates a decadent dessert that delights every palate.
Ingredients
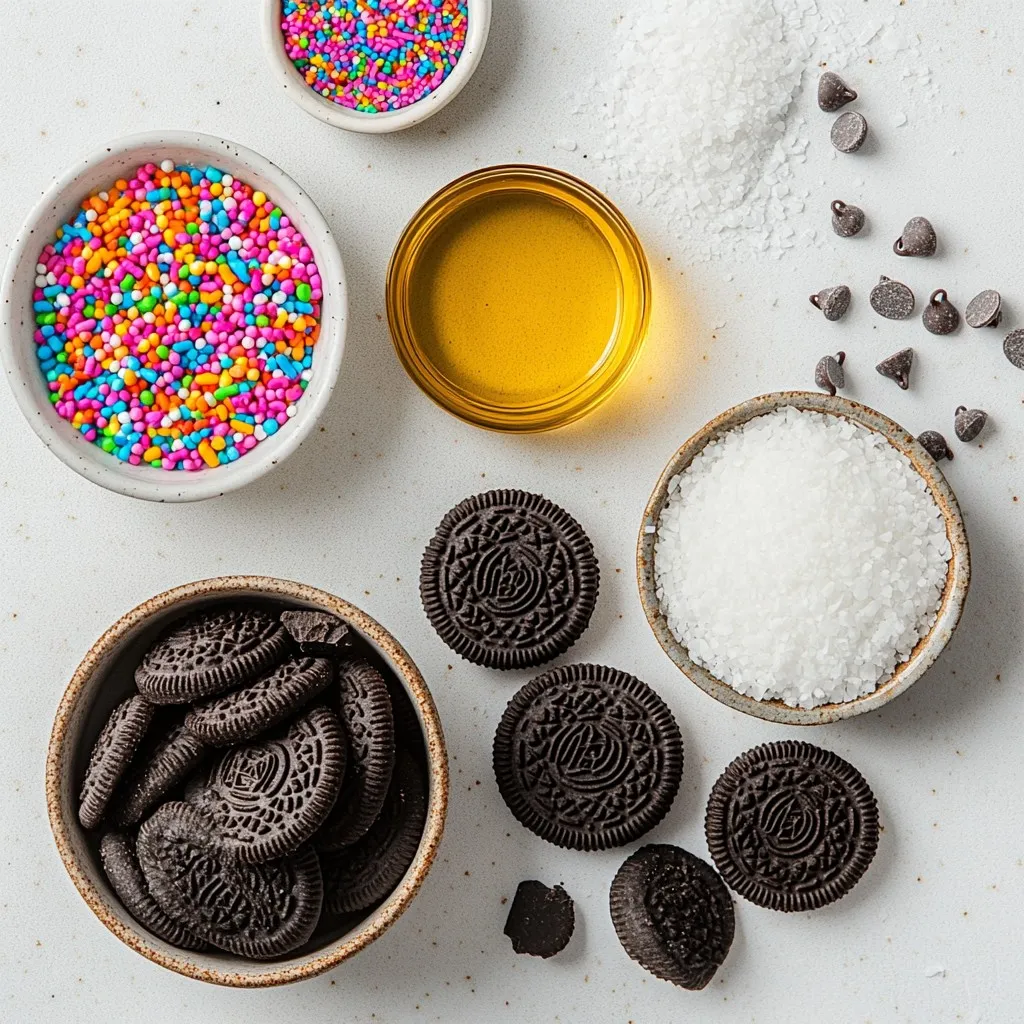
Oreo Cookies
You will need one package of Oreo cookies. The family size works best. These classic cookies have a rich, creamy filling. They provide the perfect base for our treat.
Chocolate and Additives
For the chocolate, use 2 cups of semi-sweet chocolate chips. This will create a nice, sweet coating. You can add 1 tablespoon of coconut oil if you like. This makes the chocolate smoother and richer. Melt the chocolate in the microwave. Stir it often to avoid burning.
Optional Toppings
Get 1 cup of colorful sprinkles for a fun look. They add a festive touch to your Oreos. You could also use sea salt flakes. Just a pinch on top gives a sweet and salty flavor contrast.
Step-by-Step Instructions
Preparing Your Workstation
Start by getting your space ready. Line a baking sheet with parchment paper. This helps the Oreos not stick. It also makes cleanup easy later. Make sure you have all your tools close by.
Melting the Chocolate
Next, it’s time to melt the chocolate. Take 2 cups of semi-sweet chocolate chips. If you want a smooth mix, add 1 tablespoon of coconut oil. Put the chips in a microwave-safe bowl. Heat them in the microwave for 30 seconds. Stir well after each time. Keep doing this until the chocolate is melted and shiny. It should take about 1-2 minutes in total.
Dipping the Oreos
Now, grab an Oreo cookie. Hold it by one edge. Dip it into the melted chocolate, making sure it is fully covered. Lift it out with a fork, letting the extra chocolate drip back into the bowl. Place the coated cookie on your prepared baking sheet. Repeat this with all the cookies.
Adding Toppings
If you want to make your Oreos pop, now is the time. While the chocolate is still warm, sprinkle colorful sprinkles over the top. This makes them look festive. If you prefer a fancy touch, sprinkle some sea salt flakes on top. This adds a nice sweet and salty balance.
Setting the Chocolate
Finally, let the chocolate set. Put the baking sheet in the refrigerator. Allow the cookies to chill for about 15-20 minutes. They should be firm to the touch. Once set, your chocolate-covered Oreos are ready to enjoy!
Tips & Tricks
Best Chocolate for Dipping
For dipping, I love using semi-sweet chocolate chips. They melt easily and taste great. You can also try dark chocolate for a richer flavor. If you want a lighter touch, use white chocolate. It’s creamy and sweet. Just remember to adjust the dip time if you switch chocolates.
How to Achieve a Smooth Coating
To get that smooth coat, melt the chocolate slowly. Use a microwave in short bursts. Stir between each burst. This helps keep the chocolate glossy. Adding a tablespoon of coconut oil makes it silkier. It helps the chocolate glide over the cookies better, giving a neat finish.
Serving Suggestions
Serve these treats on a pretty plate. You can add a mix of colorful sprinkles for fun. If you want a more classy look, sprinkle some sea salt flakes on top. They balance the sweetness and add a nice crunch. For a fun twist, place them in a clear jar for a gift.
Pro Tips
- Use Quality Chocolate: For the best flavor and smoothness, opt for high-quality semi-sweet chocolate chips. This will enhance the overall taste of your dipped Oreos.
- Chill the Oreos: Before dipping, refrigerate the Oreos for about 10 minutes. This helps the chocolate coating to set faster and prevents the cookies from becoming too soft.
- Add Flavors: Experiment with different flavors by adding a few drops of peppermint or orange extract to the melted chocolate for a unique twist!
- Store Properly: Keep the dipped Oreos in an airtight container at room temperature to maintain their crispiness. If stored in the fridge, let them sit at room temperature for a few minutes before enjoying.
Variations
Different Types of Chocolate
You can use many kinds of chocolate for your dipped Oreos. Semi-sweet chocolate is the classic choice. It gives a rich, sweet taste. Dark chocolate offers a bolder flavor. It has less sugar and pairs well with the cream filling. If you want a sweeter option, try milk chocolate. For a fun twist, use white chocolate. It adds a creamy touch. You can also mix flavors by combining different chocolates. This creates a layered look and taste.
Flavor Additions for Oreos
Enhance your Oreos with fun flavors! You can add a touch of peppermint extract to the chocolate. This gives a minty kick. For a fruity twist, try orange or raspberry extracts. Just a few drops will change the taste. You can also use flavored Oreo cookies. Mint, peanut butter, or birthday cake flavors work great. They add extra fun to your treats!
Seasonal or Holiday Themes
Make your chocolate-covered Oreos festive for any season. For Halloween, use orange and black sprinkles. You can even shape them like pumpkins. For Christmas, use red and green sprinkles. Add a drizzle of white chocolate for a snowy effect. For Valentine’s Day, pink sprinkles and heart shapes work well. You can customize your Oreos for any occasion. This makes them perfect for gifts or parties!
Storage Info
How to Store Chocolate Covered Oreos
Store your chocolate-covered Oreos in an airtight container. This keeps them fresh and protects them from air. If you made a lot, layer them with parchment paper. This prevents them from sticking together.
Shelf Life
Chocolate-covered Oreos last about a week at room temperature. If you keep them in the fridge, they can last up to two weeks. Just make sure they are in an airtight container. This helps maintain their taste and texture.
Best Temperature for Storage
The best temperature for storing chocolate-covered Oreos is cool, around 65 to 70 degrees Fahrenheit. Avoid hot areas, as heat can melt the chocolate. If you live in a warm climate, refrigeration is a good option. Just remember to let them sit for a few minutes before enjoying, as the chocolate will be colder than the cookie.
FAQs
Can you use white chocolate instead of semi-sweet?
Yes, you can use white chocolate. It melts nicely and gives a sweet taste. Just follow the same steps for melting and dipping. White chocolate adds a fun twist to your treats. Try it with sprinkles for a colorful look.
Where can I buy chocolate-covered Oreos?
You can buy chocolate-covered Oreos at many stores. Look in the snack aisle or the cookie section. You might find them at big grocery stores or online. Make sure to check local shops for unique flavors too.
Are chocolate-covered Oreos safe to freeze?
Yes, chocolate-covered Oreos are safe to freeze. Just place them in an airtight container. This helps keep them fresh and tasty. When you’re ready to eat, let them thaw in the fridge for a bit. This keeps the chocolate smooth.
How many calories are in a chocolate-covered Oreo?
A chocolate-covered Oreo has about 100 calories each. This can change based on the type of chocolate and toppings you use. Always check the package for exact numbers. Enjoy them as an occasional treat!
You now know how to make chocolate-covered Oreos. We covered ingredients, step-by-step instructions, and helpful tips. You can also try tasty variations and learn storage methods.
These treats are fun and easy to make. They impress everyone and satisfy your sweet tooth. Enjoy your creative process, and happy dippin