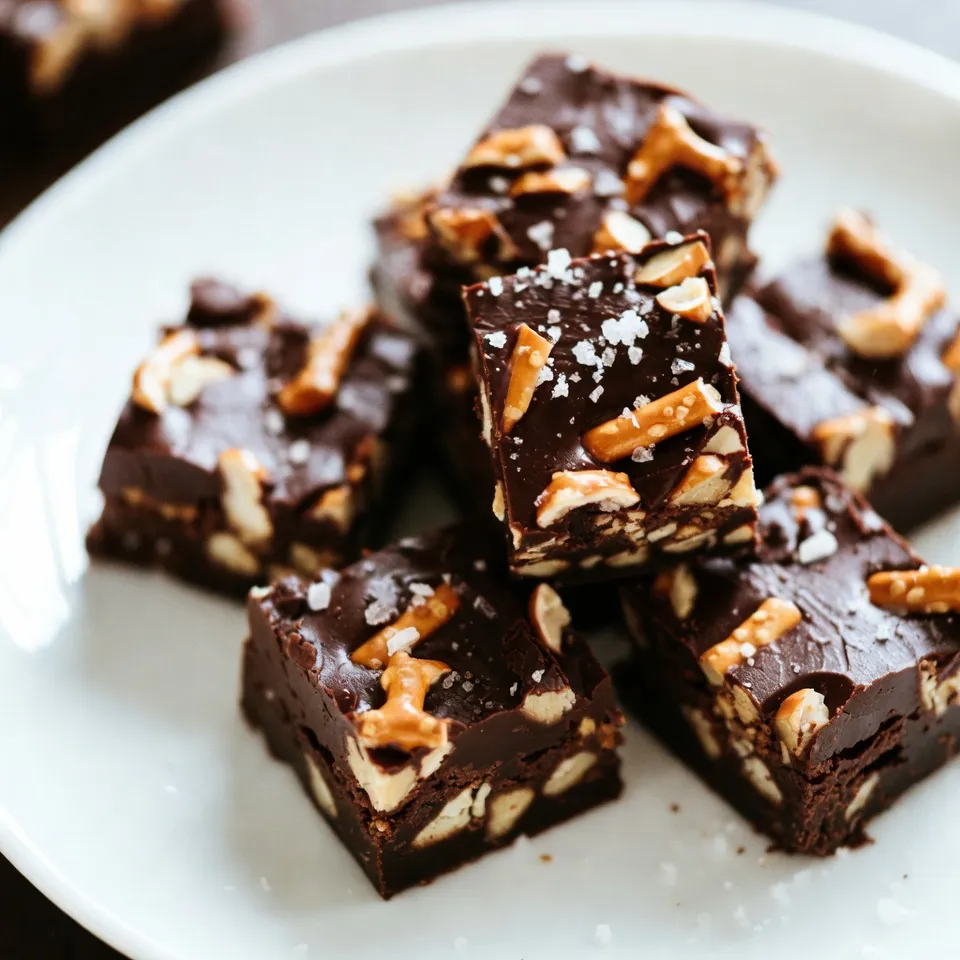
Craving a treat that balances sweet and salty? Look no further! Chocolate Covered Pretzel Fudge is your answer. This creamy fudge combines rich chocolate with the satisfying crunch of pretzels. It’s simple to make and perfect for any occasion. Whether you’re a seasoned baker or a kitchen newbie, my step-by-step guide will have you whipping up this irresistible delight in no time. Get ready to impress your friends and family with a dessert they’ll love!
Why I Love This Recipe
- Decadent Flavor: This fudge combines the rich taste of chocolate with the salty crunch of pretzels, creating a delightful sweet-and-salty treat.
- Easy to Make: The straightforward steps and minimal ingredients make this recipe perfect for both novice and experienced bakers.
- Customizable: Feel free to add your favorite nuts or adjust the pretzel amount, allowing for a personalized touch to every batch.
- Perfect for Sharing: Cut into bite-sized squares, this fudge is an ideal treat to share at parties, gatherings, or as a thoughtful gift.
Ingredients
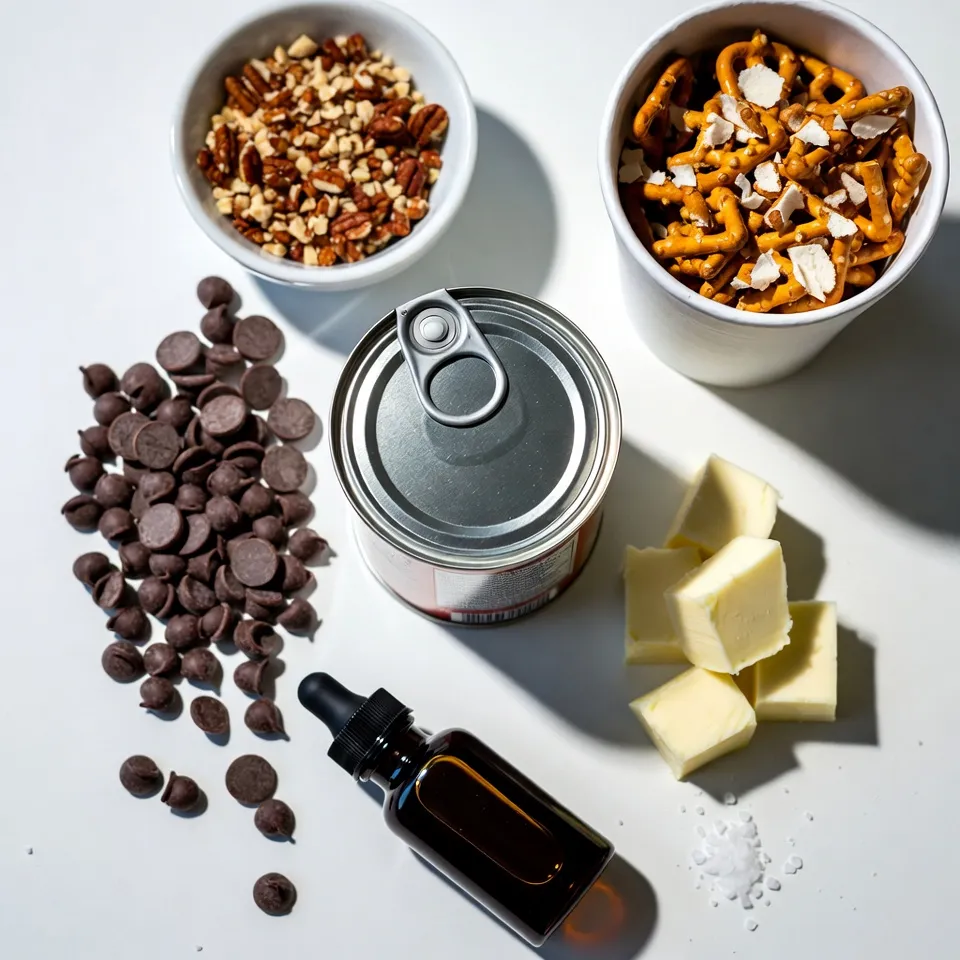
Complete List of Ingredients
– Chocolate and Dairy Components
– 2 cups semi-sweet chocolate chips
– 1 can (14 oz) sweetened condensed milk
– 1/2 cup unsalted butter, cut into 1-inch cubes
– 1 teaspoon pure vanilla extract
The chocolate and dairy mix creates a rich and smooth base. The sweetened condensed milk adds sweetness that balances the salt from the pretzels. Butter helps to give the fudge a creamy texture.
– Optional Add-ins (Nuts and Toppings)
– 1 cup crushed pretzels (plus extra for garnishing)
– 1/2 cup chopped nuts (optional; recommended: pecans or walnuts)
Crushed pretzels add a delightful crunch and salty bite. Nuts can enhance the flavor and add a nice texture, but they are not a must.
– Garnishing Items
– Flaky sea salt for garnish
A sprinkle of flaky sea salt gives each piece a pop of flavor. It enhances the sweet-and-salty mix that makes this fudge irresistible.
Each ingredient plays a key role in creating this tasty treat. Feel free to mix in your favorite nuts or toppings for a personal touch!
Step-by-Step Instructions
Preparation of the Baking Pan
To start, line an 8-inch square baking pan with parchment paper. I like to let the paper hang over the edges. This makes it easy to lift out the fudge later. If you want, you can use a larger pan, but keep in mind the fudge will be thinner.
Chocolate Mixture Melting Process
Next, we will melt the chocolate mixture. Combine the semi-sweet chocolate chips, sweetened condensed milk, and butter cubes in a medium saucepan. Place this pan over low heat. Stir it gently and keep an eye on it. Low heat helps the chocolate melt evenly. If you rush, the chocolate may burn, and that’s not what we want!
Combining Ingredients
Now it is time to combine the ingredients. Once the chocolate is smooth, add the crushed pretzels and optional nuts into the warm mixture. Use a spatula to carefully fold in the pretzels and nuts. Make sure every piece is coated in chocolate. This will give you that rich taste in every bite.
Chilling and Serving the Fudge
After mixing, pour the fudge into the lined pan. Spread it out evenly. Press a few whole pretzels on top for a nice look. Place the pan in the fridge. Let the fudge chill for at least 2 hours. This helps it firm up. When it is set, lift the fudge out using the parchment paper. Place it on a cutting board and slice it into squares. For a fun touch, sprinkle some flaky sea salt on each square. This brings out the sweet and salty flavors perfectly.
Tips & Tricks
Perfecting the Fudge Texture
To avoid graininess in the chocolate, always use low heat. High heat can cause chocolate to seize. Stir the mixture constantly as it melts. This keeps the texture smooth and creamy.
Achieving the right consistency is key for fudge. It should be thick but pourable. If it feels too runny, let it cool slightly. Once it cools, it will thicken as it sets in the fridge.
Presentation Enhancements
Creative ways to plate the fudge include using colorful plates. A white plate makes the fudge look rich and appealing. You can also stack the fudge squares for height. This adds visual interest to your dessert table.
For drizzles and toppings, melted chocolate works best. A light drizzle over the fudge adds flair. You can also sprinkle crushed pretzels or nuts on top. This enhances both taste and texture.
Making Ahead of Time
Best practices for prepping fudge in advance include making it one to two days before serving. This allows the flavors to meld perfectly. Store it in the fridge until you’re ready to serve.
Check for freshness by looking for any changes in texture. If the fudge feels sticky or grainy, it may not be fresh. Proper storage keeps it tasting great for up to a week.
Pro Tips
- Use Quality Chocolate: The flavor of your fudge largely depends on the quality of chocolate chips you use. Choose a reputable brand for the best taste.
- Let It Chill Completely: Ensure that the fudge is fully chilled and set before cutting. This will help you achieve clean, neat squares.
- Experiment with Mix-Ins: Feel free to add other mix-ins like crushed candy canes, toffee bits, or dried fruits for a unique twist on the classic recipe.
- Store Properly: Keep the fudge in an airtight container in the refrigerator for up to two weeks to maintain its freshness and flavor.
Variations
Flavor Variation Ideas
You can make this fudge even better by adding some extracts. Try mint or almond extract for a fun twist. Just add one teaspoon to the melted chocolate mix. It gives the fudge a nice touch.
You can also change the type of chocolate you use. Dark chocolate adds a rich flavor. Milk chocolate gives a sweeter taste. White chocolate can add creaminess. Each option changes the fudge in a unique way.
Dietary Alternatives
If you want a dairy-free option, use dairy-free chocolate chips. Replace the sweetened condensed milk with coconut milk. This makes the fudge rich and creamy without dairy.
For a low-sugar version, look for sugar-free chocolate chips. You can also use unsweetened cocoa powder with a sugar substitute. This way, you can enjoy the treat while keeping sugar low.
Seasonal Twist Suggestions
During holidays, you can add festive ingredients. Try mini marshmallows or crushed peppermint for a holiday flair. You can even mix in dried cranberries for a splash of color.
When it comes to presentation, think seasonal. Use red and green sprinkles for Christmas. For Halloween, add orange and black sprinkles. These small touches make your fudge look even more special.
Storage Info
Best Storage Practices
– Use an airtight container to keep the fudge fresh.
– Glass or plastic containers work well.
– Place parchment paper between layers of fudge to prevent sticking.
To keep fudge fresh longer, store it in a cool, dry place. Avoid direct sunlight or heat. Keeping it in the fridge can help it last even longer.
Freezing the Fudge
– Cut the fudge into squares before freezing.
– Wrap each piece in plastic wrap tightly.
– Place wrapped fudge in a freezer-safe bag or container.
To thaw, simply take it out of the freezer. Let it sit at room temperature for about 30 minutes. This way, you get the best taste and texture.
Shelf Life Tips
– Fresh fudge can last about two weeks in the pantry.
– In the fridge, it can stay good for up to a month.
– Look for signs like an off smell or changes in texture.
If your fudge feels hard or dry, it may be time to toss it. Always check before enjoying!
FAQs
What is the best way to cut fudge?
To cut fudge, use a sharp knife. A warm knife helps to make clean cuts. You can warm it by dipping it in hot water. Wipe the knife dry before cutting.
Fudge is best cut when it is cold. If it is too soft, it can fall apart. Chill it in the fridge for 2 hours before cutting. This helps it hold its shape.
Can I use different types of chocolate?
Yes, you can use various chocolates for your fudge. Dark chocolate gives a rich taste. Milk chocolate makes it sweeter. White chocolate adds creaminess but will change the texture.
Pair the chocolate type with pretzels. Use dark chocolate for a bold flavor. Milk chocolate works well for a classic sweet treat. White chocolate can be fun but may overpower the pretzel taste.
How do I ensure my fudge sets properly?
To help your fudge set right, follow key tips. First, ensure you use the correct amount of sweetened condensed milk. This helps give it a firm texture.
Mix well to avoid lumps. Stir until the chocolate is silky smooth. After pouring it into the pan, press it down firmly.
If the fudge does not set, it may be too warm. Place it back in the fridge. Let it chill longer if needed.
This article covered how to make perfect fudge, focusing on ingredients, preparation, and storage. You learned about the best tips for a smooth texture, creative presentations, and variations to try. Remember, mastering fudge means practice. Don’t be afraid to experiment with flavors or toppings. Create your own special version! Whether serving at a party or enjoying at home, your fudge will impress. Happy baking, and enjoy every delicious bit